
CEO
DIY: How to add product reflection in Photoshop?
At first glance, you may think what a chore this will be? But take it from us, or better yet read up and see how simple it can be. If you think, not for me, then think again if you want to make your shop look professional and not fall into the every-shop-zone. You want to differentiate between just ok and amazing. Modern times ask for modern technology so have a look and convince your customers even more by letting them commit by teasing their brain for the long run.
Convinced, then let’s dive in!
You can go about it in two different ways: get your hardware setup for shooting them with the reflection directly retrieved from setup or you can follow the steps below and do even better then you could ever imagine by setting up you very expensive photography environment, including the best and therefore most expensive hardware on the market. In the end, you want the look and feel of the reality we encounter in our daily lives. And you’re right, we can’t except less because looking at images is the same as living your lives (the visual aspect of course) with some crazy sample rate or resolution we should not perceive. So, let’s go, because this is what you will achieve if following the steps below.
Enough talk let’s get down to it!
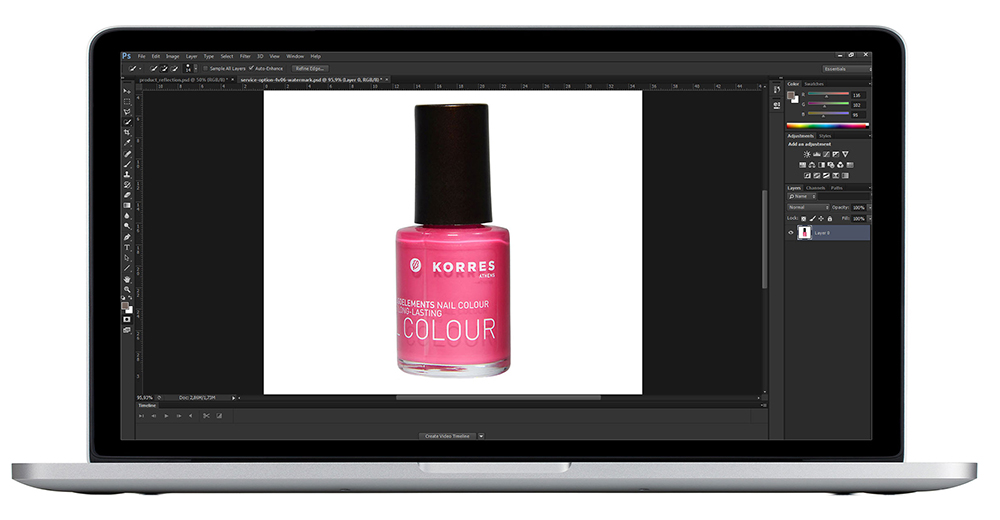
This is not really a step but a necessity. Please open your product image in Photoshop. We’ll take something not too exotic but certainly difficult enough to convince you that this is possible for all your products. Nail polish is what we’ll use. Why? See the transparent glass at the bottom, including the bottom radius. But also, some defects are present because we know how hard it is to get top images in high resolution with the consistency you need.
Selecting product pixels
In this case, as in most cases, we don’t need to assemble the reflection from the pixels that do not belong to the product, e.g. the environment that the product ‘lives’ in. So, let’s select the product from our image. Again, two ways exist on how to accomplish this; depending on the quality and contrast of your image. The first option is to use the pen tool to create a path. This path can then be selected. The second way is to use the quick selection tool and directly go ahead with the selection of your product.
Notice that at the same time you can remove the image background if this background would still exist at this point.
Creating the reflection layer
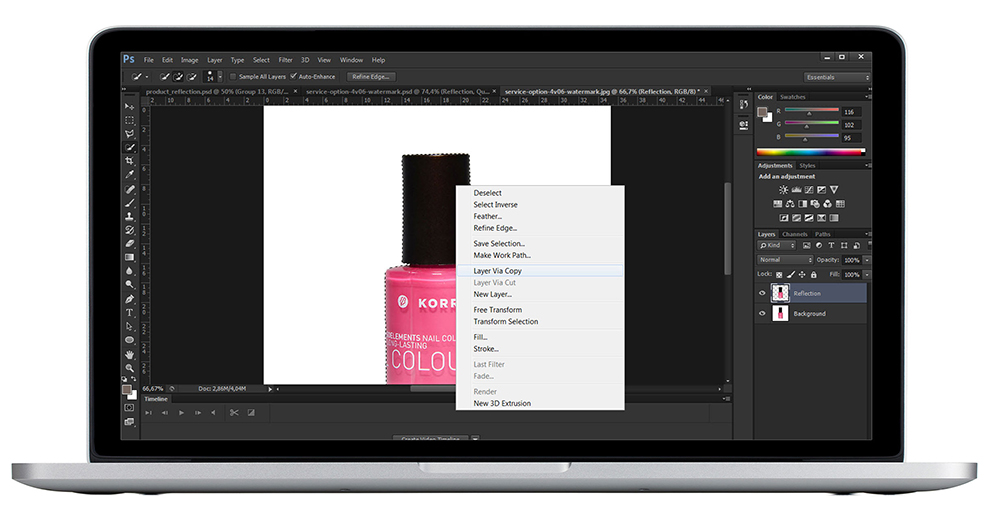
While one of the Marquee tools is selected, right-click the selected area followed by clicking Layer via Copy. Notice that a new layer unfolds itself. And you guessed it right, this will be the product reflection layer.
A lot of the work is already done at this stage because we only are using these two layers for the result and no intermediate layers are created.
Flip the reflection layer vertically
In mathematical terms, one could state that we want to mirror with respect to the horizontal axis, but I don’t want to stop you from reading so let’s reformulate and give you the action and direction.
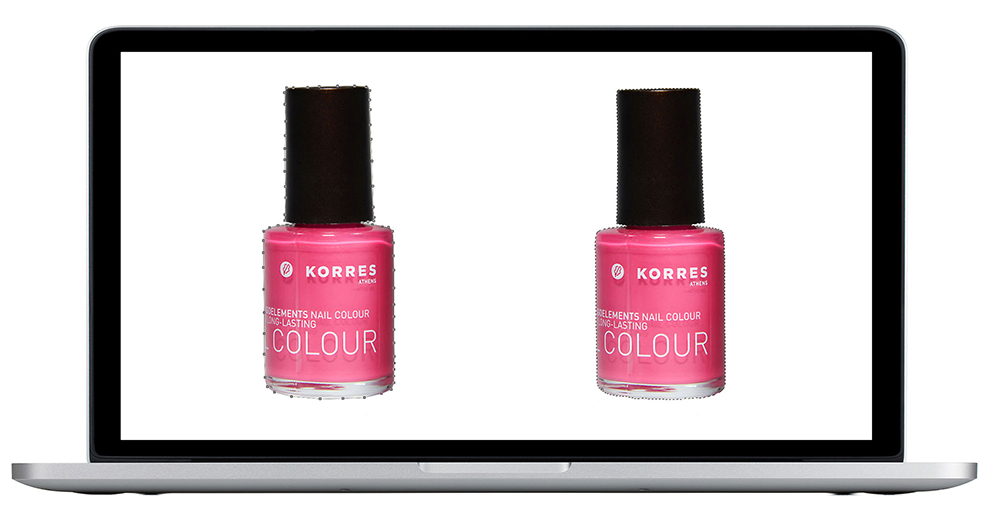
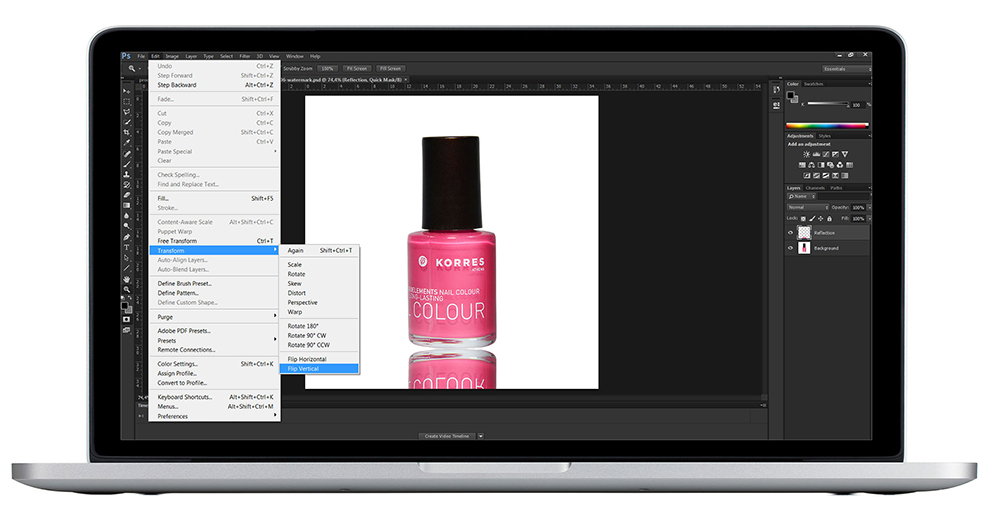
You’re now going to need to mirror or flip the product reflection layer. Again, very easy to execute with a simple click. First, select the reflection layer and go to Edit > Transform > Flip Vertical. Once its flipped or mirrored, move the refection layer down so both bottom edges are just touching. See the reflection appearing? Like you placed your product on a perfect mirror or something…
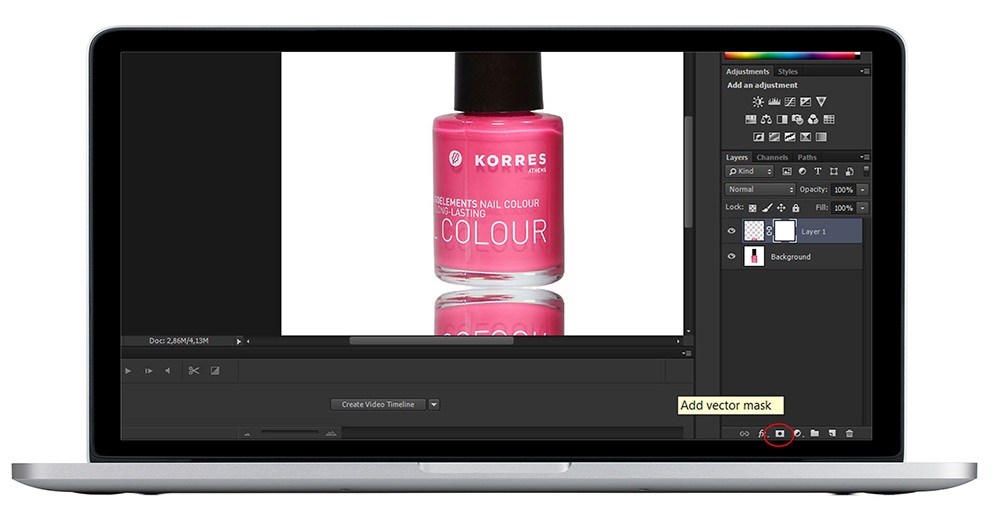
Add a vector mask to the reflection layer
As you hopefully do not shoot images on a mirror, we’re going to upgrade the reflection to really give your customers the best product-image-experience they deserve by making the reflection look amazing. Select the reflection layer and simply click the Add vector mask button at the bottom of your Photoshop interface. A mask now sits on your layer which we will use to make your reflection fade out as it should.
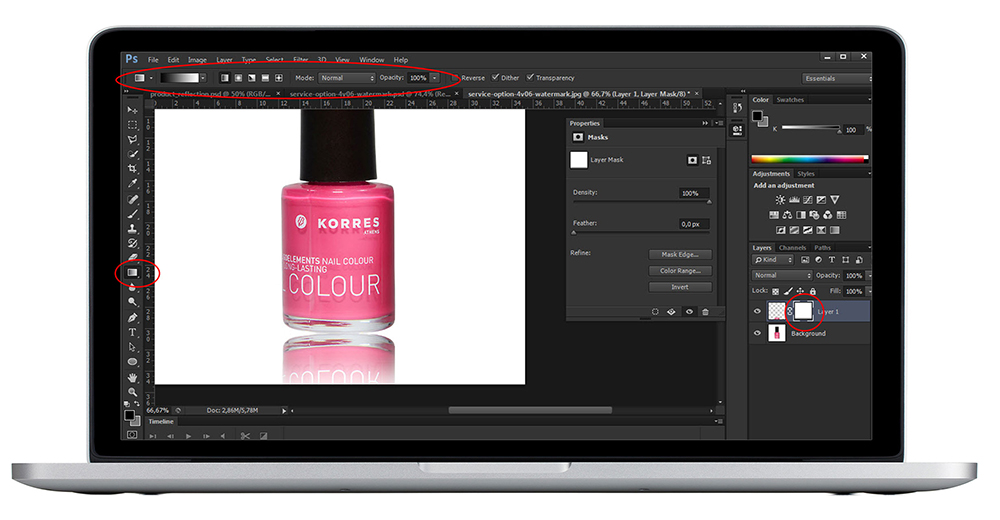
Fading out your reflection with the gradient tool
First, make sure the reflection layer mask is selected. Double-check that this is done because mistakes are bound to happen at this stage. You can verify it by checking out the four white square angles around the mask rectangle icon on the product reflection layer. Secondly activate the gradient tool by pressing ‘G’ on your keyboard or selecting the Gradient tool on the left-hand side of your interface, in your toolbar palette.
Some parameters are set by default but maybe you tweaked them during your previous design so let’s summarize them. The gradient tool itself needs the Black and white preset. And the gradient type is Linear with the mode set on Normal.
To apply the gradient, we need to let Photoshop know where to start and where to end (a gradient in general needs existence, right!). So, start at the top of your product reflection while holding the ‘left mouse button’ and continue to move to the bottom of your product reflection. At the bottom, you may release the mouse button. Out partying last night, not to worry you can make sure the line is straight by holding the ‘shift key’ while moving the cursor from top/start to bottom/end.
At this stage, the reflection should fade out in the right direction. At this stage, you should see improvements towards realistic reflection. Nice, right? If looks crazy or ugly, give it another try by first pressing control-z/command-z or better yet hit Ctrl+Alt+Z on Windows or Opt+Cmd+Z on Mac and go back as far as your last save.
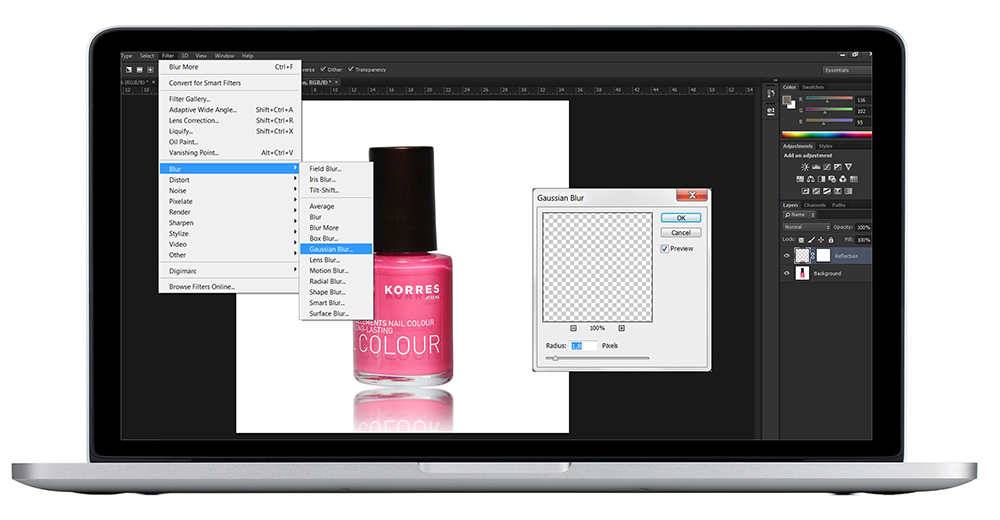
Even more realistic by blurring the reflection
We’re all about realism, so let’s add some noise to the world our image lives in. Real live noise is almost always Gaussian so let’s add this so-called ‘white noise’. First, make sure you’ve selected the reflection layer, NOT the reflection mask from the step above. Open the Filter menu, followed by the Blur menu, and select, you’ve guessed it, Gaussian Blur. A window pops open in which you may set the filter radius by means of the provided slider or just numerically. For our nail polish, try moving the radius slider up and down to see what looks best. In my example, we went for a 1.8 pixels blur radius, but this is up to you. I’m sure you know what to do!
Dotting the i’s, with opacity on the reflection layer
We love dotting the i’s, so if you don’t mind… A final tweak on the reflection will only add as one could still argue that the surface on which the product rests is still a bit too much polished for our feeling of reality. Play around and see what happens.
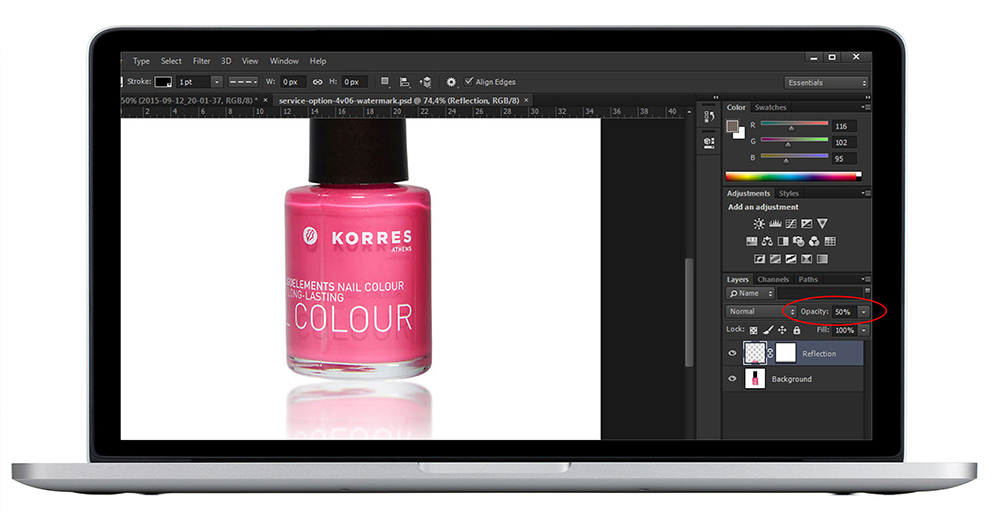
That’s it. Hope this reading gives you some more tools to play around and manipulate your images in a positive way. Maybe I should mention that iterating the final two steps never hurt, and while doing so it will only increase your feeling about the perception of reflection in your daily life. But know that in the end, we still want you to sell more products and grow your business so play and try but don’t spend too much time on these issues because we’re happy to take over with an-in-conjunction optimized process that’s efficient in way’s you cannot imagine so you can do what you do best which is most likely something we can’t even comprehend.