CEO
Use ghost mannequin photography techniques to sell more
Online apparel retail photography can utilize both models or mannequins to showcase their products. The upside in utilizing both is obvious, more great content equals more conversion and customer engagement for your business. But be aware, when mixing these two types of product images on your category pages, it could end up messy and confusing for your customers.
Nowadays, many solutions exist to overcome these problems and still utilize both. For instance, consistently switching between the model wearing the product and the non-distracting ghost mannequin representation of your product. Stores like MANGO or EXPRESS use for instance a transition between model and a single product to create an amazing customer experience and make sure the customer is satisfied both ways.
Professional model photography
Mostly for large online retailers or big brands, creating perfect consistency time and time again. Stepping out of the photo studio is only the first step to getting towards production. A subset of photos is handpicked for processing. During the processing phase, these photos are optimized through image editing techniques on many levels, and all according to specification. Still with me? But still not yet in production! Again, images are discarded, and the final apparel product image set is contained for production.
Time is of the essence and production delays are unacceptable. Consider that professional models are expensive, and image editing is always necessary. Now think about resources, seasonal needs, and quality control on all levels.
Non-professional model or mannequin photography
For both small and large online retailers and brands. Why? Because some customers find non-professional models and certainly mannequins distracting, yielding a lower conversion rate. Like already mentioned, utilizing both is the optimal solution. Using one or the other with perfect consistency is for most retailers sufficient.
One certainty, people need to able to relate themselves with the product, imagining using the product, wearing the product, etcetera. Personal experience through visualization does not come cheap, or does it?
Ghost mannequin effect for your product photos
Hopefully, by now you already realize that laying out your apparel products flat on some table will raise too many questions for your customers, by lacking the user experience of not imagining wearing the product in its 3D form.
Personal experience through visualization does not come cheap, or does it? It does, with just a limited budget, a static mannequin, a co-worker, or even a friend you can create a 3D effect for your product images. Mostly referred to as the “ghost mannequin” technique, but also widely spread under the term “invisible mannequin”.
Ghost mannequin effect using static mannequins
The variety of available mannequins is limitless. Choosing the right one for the job will certainly make the image editing easier. Unfortunately, it’s also dependent on the product your shooting so one-mannequin-fits-all is a bit optimistic. Below you’ll find some general pointers for choosing the one that fits your needs the most.
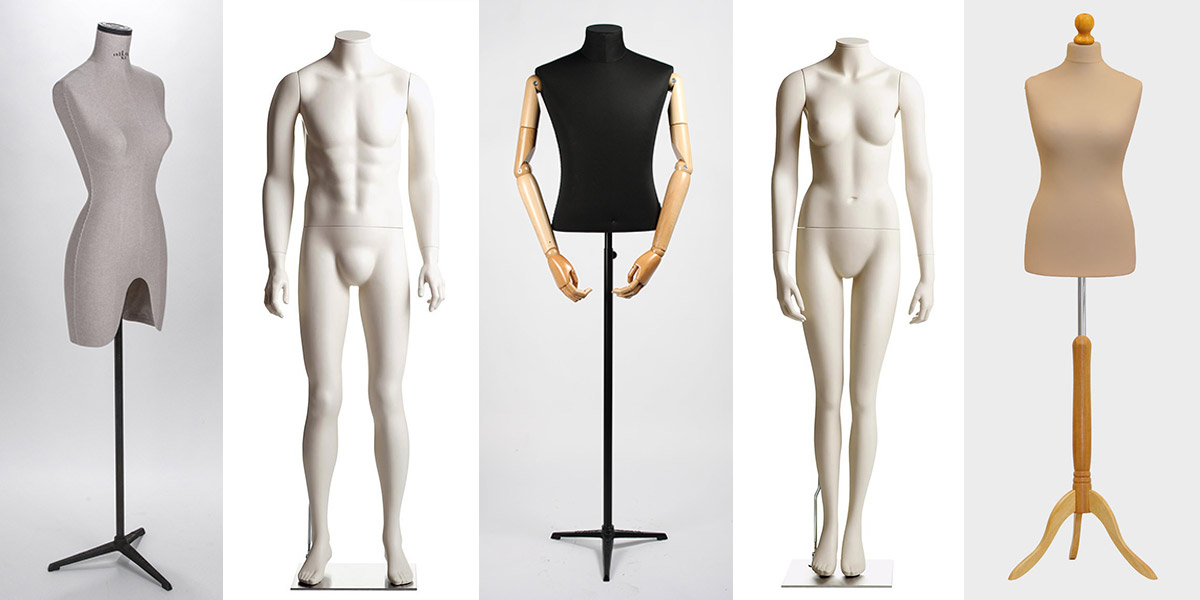
If you have access to mannequins, then use the ones that are lifelike and static. Depending on your product collection, you may choose to purchase a mannequin with or without arms, hands, or legs. For some, movable limbs can create flexibility and makes the image editing job easier and more efficient. Positioning the limbs out of the frame, avoiding overlap is also a great advantage. White, non-reflective mannequins would be our preferred choice in most cases, certainly when shooting on a white background, making the mannequin removal part easier in most cases.
Ghost mannequin effect using non-professional models
If your co-worker or friend is willing to assist (and to some extend in shape), the ghost mannequin effect can be accomplished just as easily as for a static mannequin. Photograph your model wearing the product and make sure a static position is maintained during the shoot and no limbs are in front of the product. This photo serves as the base for the 3D effect.
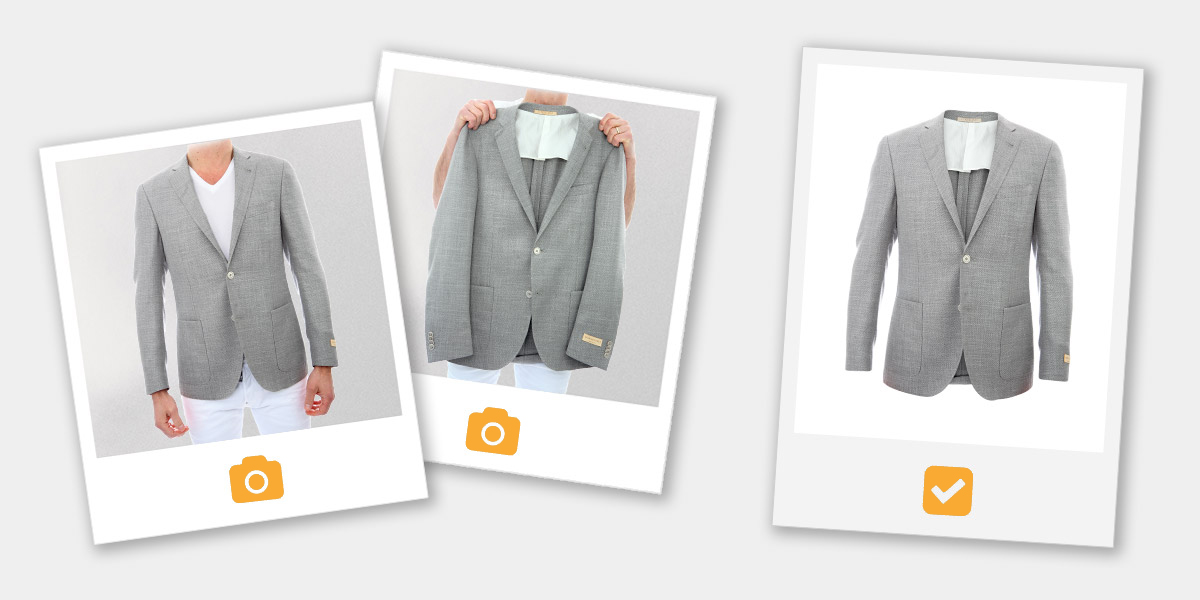
Next, you will need to fill in the missing parts of the product. This will depend on the product at hand. For instance, the blazer image at the top of this blog post is showing two input images and the final product image.
The first image provides the base for the 3D effect and the missing parts are extracted from the second image. What’s missing: the inside of the neck, the inside of the blazer, and the inside of the tail. As such, the second image reveals all these missing parts used to assemble the resulting product image.
We certainly understand that sometimes things can be tricky, and more than two images must be captured. Many examples of different apparel products could be presented but you can trust our expertise. But because we like informing everybody on how this technique relates to taking your images, below are two examples of ghost mannequin photography and the resulting product image.
Example: polo shirt
So, a polo shirt, or just a shirt for that matter. Again, starting out by photographing your model, and a second more detailed photo of the missing details.
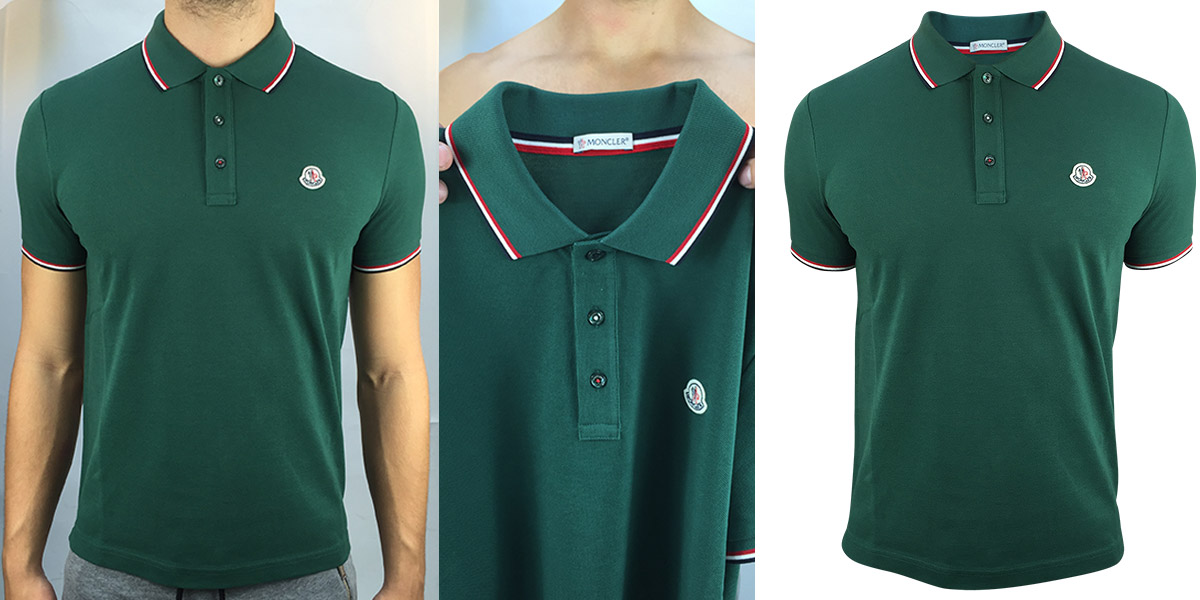
So, it’s obvious, the inside of the neck is missing. Once these two photos exist, the image editing part kicks in, combining both images into one beautiful product image.
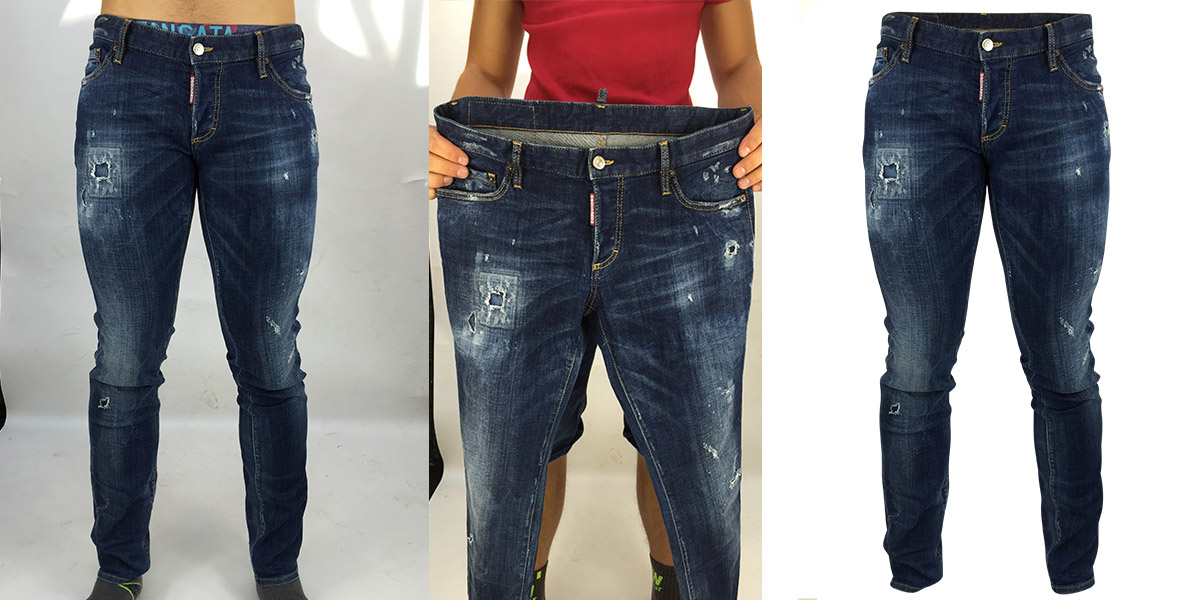
Example: pair of jeans
Again, very straight forward. If you would only remove the background from the left photo, you get a 2D impression. So, take a second photo of the inside so the 3D effect appears.
By now you should know what to do for these types of clothes if you start shooting and want to end up with a ghost mannequin effect. But never stop thinking because depending on the product, two, three, or sometimes even four photos are required for assembling the final product image.